Photo

Guide: How to Calibrate Your Zebra Printer

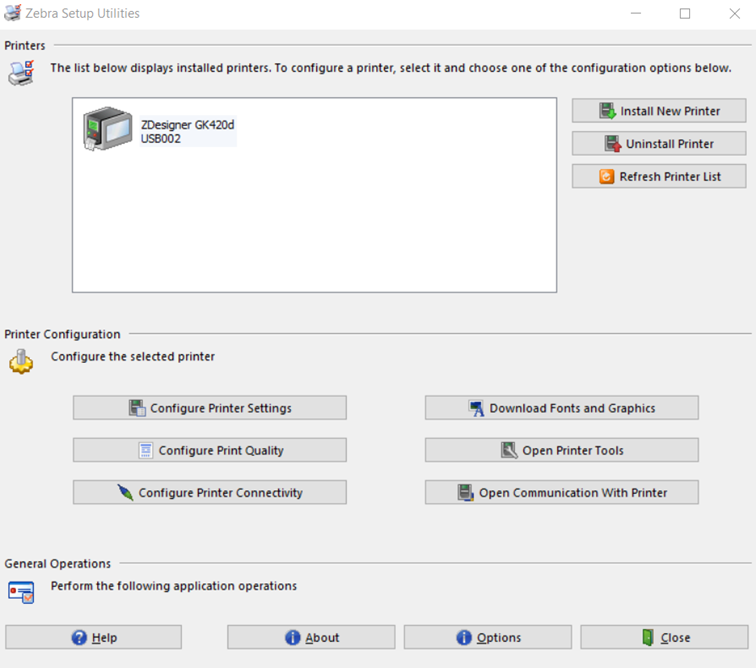
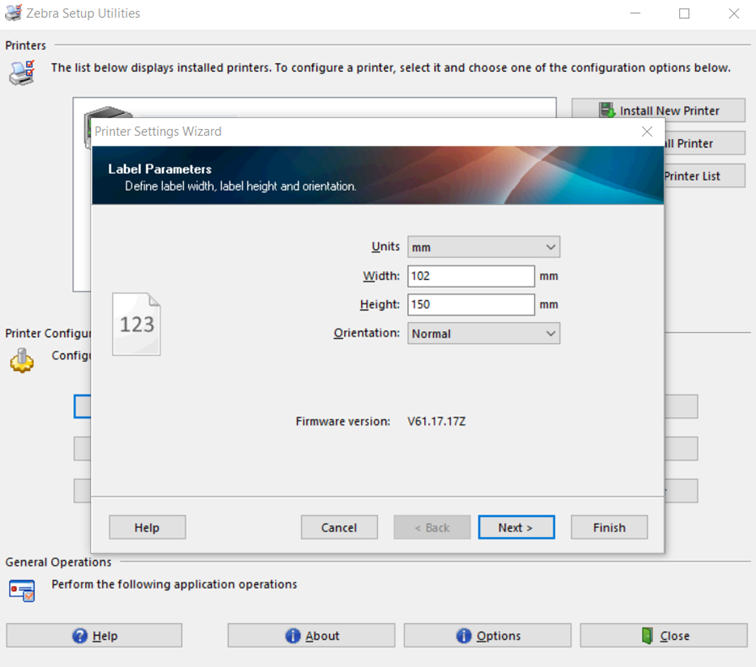
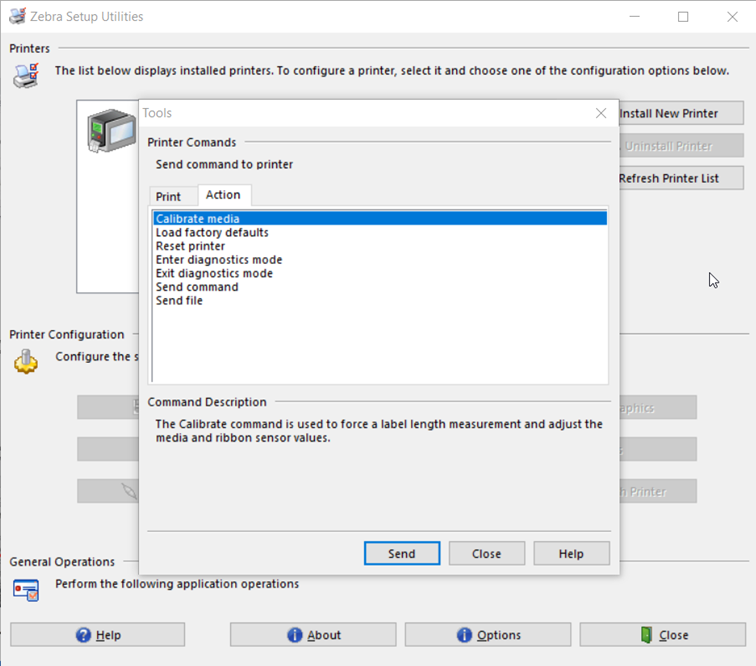
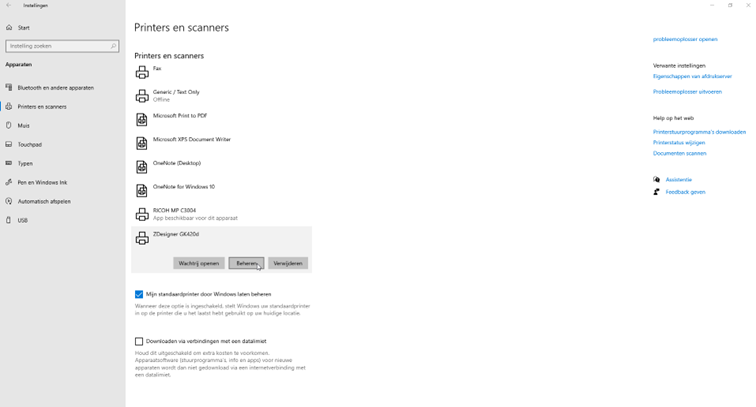
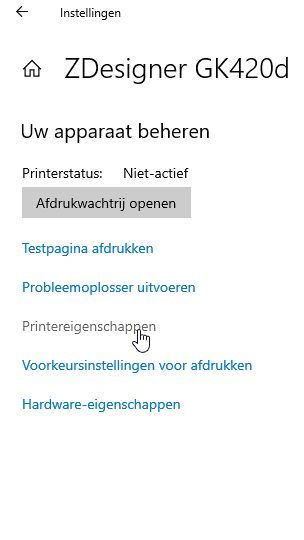
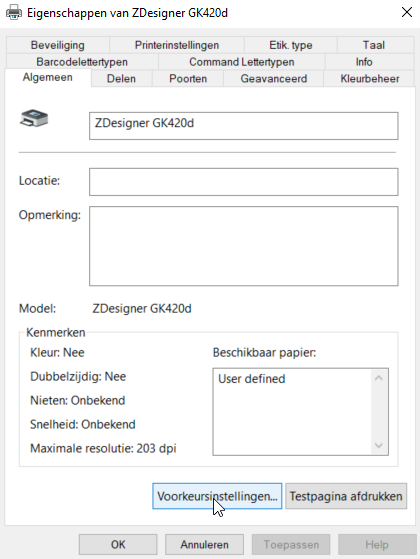
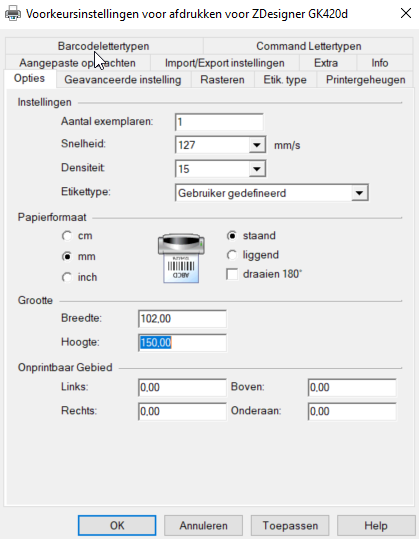
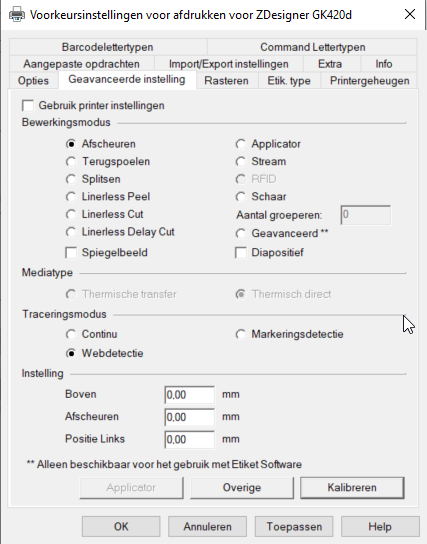
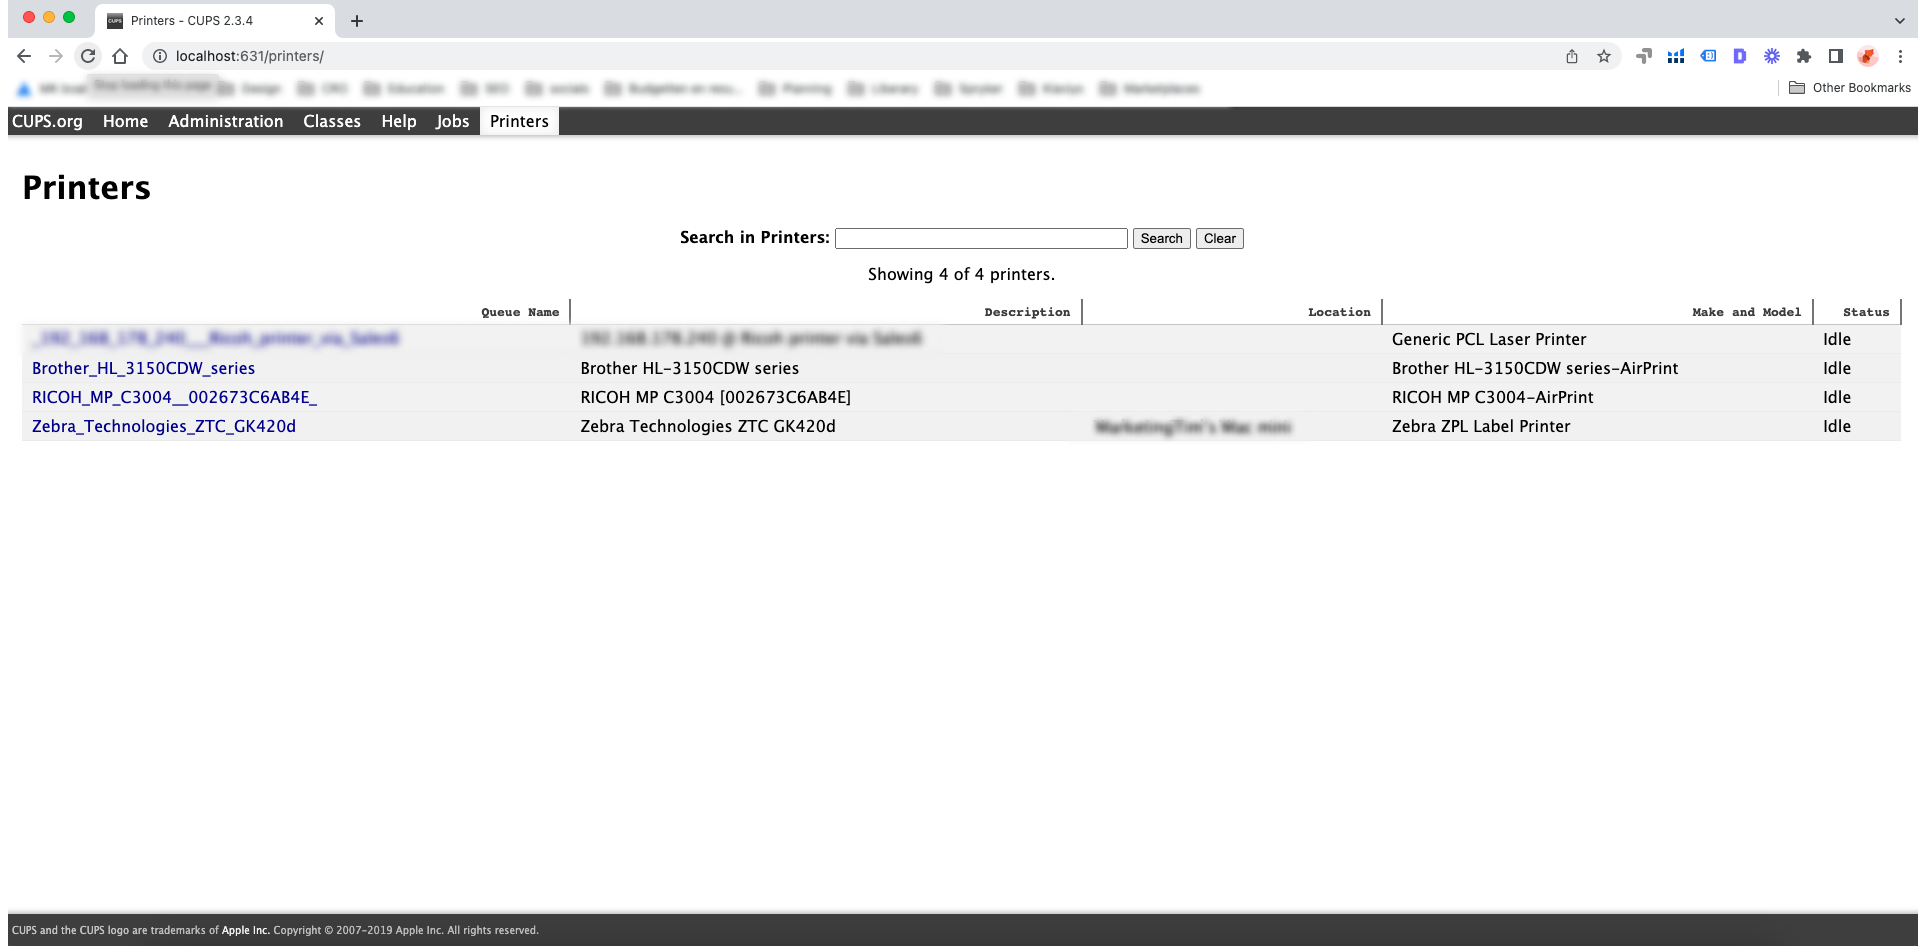
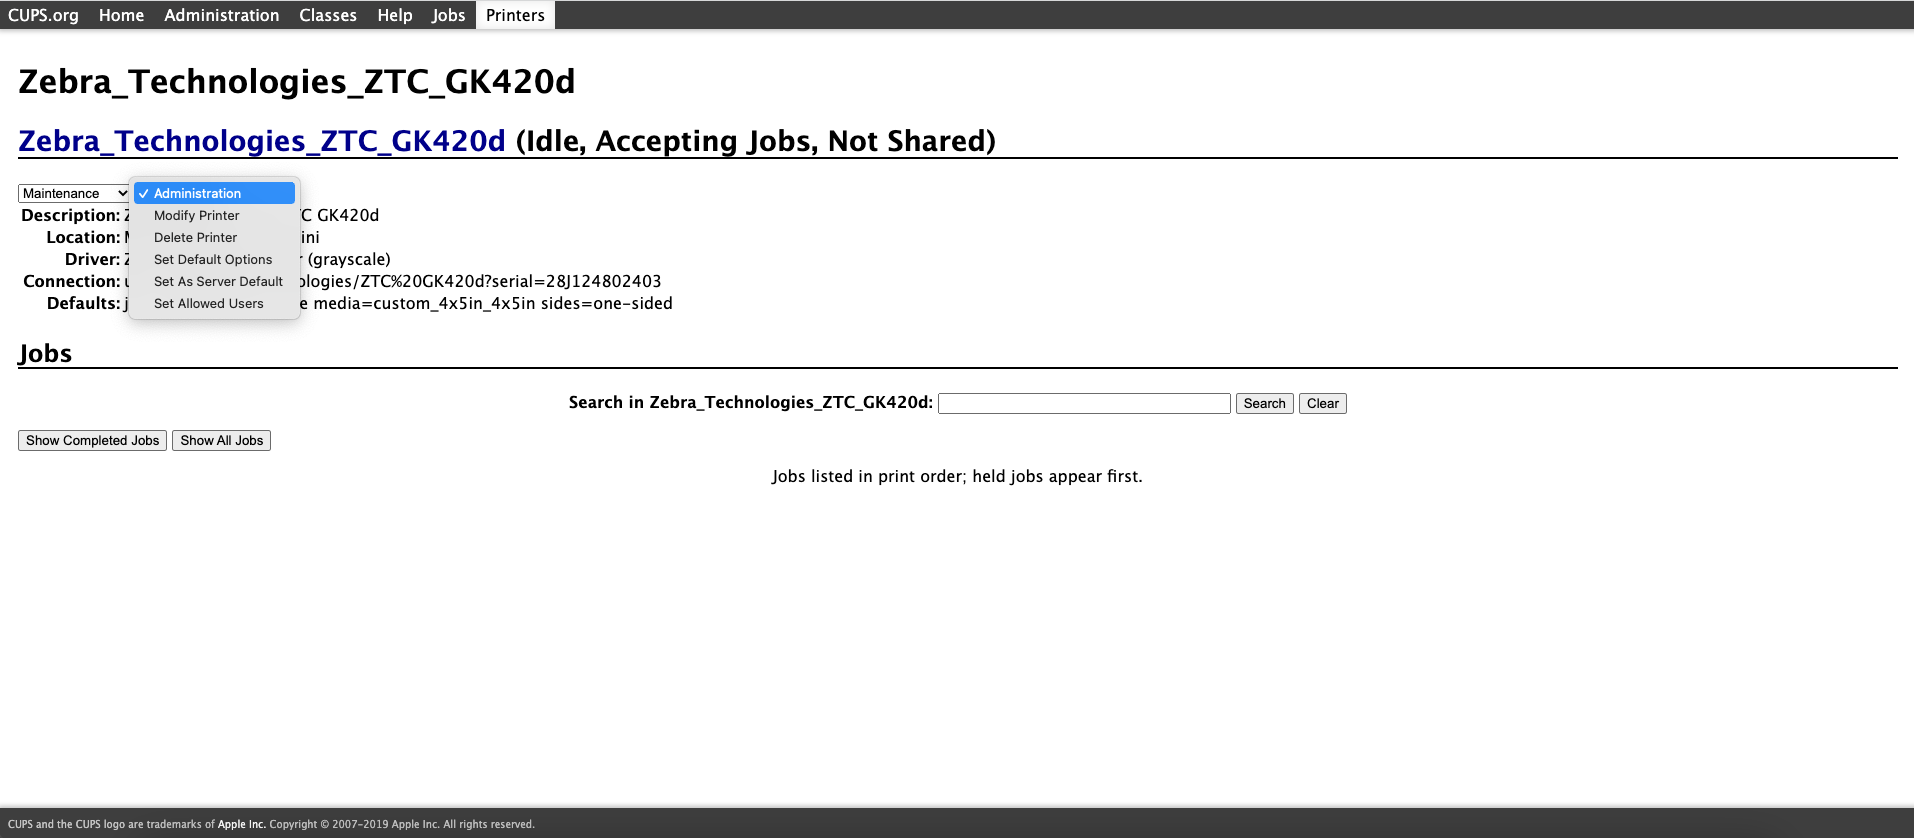
You recognize the problem, you have installed your Zebra printer and want to start printing. But you don't know how to calibrate your printer to the correct label format. That's why we at Zolemba have created a handy manual so that you never have to struggle with not knowing how to calibrate your Zebra printer again.
Still finding trouble installing your Zebra printer? Watch this video

Calibrating Your Zebra Printer: How to Do It?

In this blog, we will explain how you can calibrate your Zebra printer. If you are using a Zebra printer to print shipping labels, for example, it is important that it is well calibrated. In this guide, we will cover step by step how you can calibrate your Zebra printer for both Windows and Mac. We will show you how to set the size of your labels and how to further calibrate the printer. We will also show you how to ensure that your printer is properly set up on your computer. This way, you can confidently start printing shipping labels.The first thing you need is the correct driver to install your driver, in this case, the Zebra GK420d driver. You need this to make your label printer work properly on your PC or Mac. The installation of the printer and driver is slightly different on both systems. Below we have broken down both options so you can easily follow the installation process for either Mac or Windows.
In this blog, we have used the Zebra GK420D label printer as an example, but the process is the same for every Zebra printer, so don't worry about that. Just make sure that the name of your printer may differ from the name of the printer used in this guide.
Calibrating a Zebra printer is a little different on Mac and Windows systems. Below, we have broken down both options for you so you can easily follow the installation procedure for Mac or Windows.

Click on one of the links below to go directly to the right section.

How to calibrate your Zebra label printer in Windows
How to calibrate your Zebra label printer on the Mac

Calibrating Zebra Label Printer for Windows

Step 1:

After installing the driver on your Zebra printer, you will come to the screen below.
Click on the "Refresh Printer List" button and select your printer from the list, and then click on “Configure Printer Settings”.
Photo

Step 2:

Here, you can set the size of your labels. Make sure units are set to mm. Do you want to print a shipping label? For most carriers, the dimensions of the label are 102 mm (width) x 150 mm (height). Do you want a complete overview of the shipping labels offered by Zolemba? No problem! Go to the shipping label overview.
You can skip the other steps you encounter by clicking "Next" or directly clicking "Finish".

Photo

Step 3:

To further calibrate the printer, click on “Open Printer Tools”, go to the second tab “Action”, and select “Calibrate Media”.

Photo

Step 4:

Press "Send" to complete the calibration process. A test print will now come out of your Zebra label printer. Now you can check if your shipping label looks good and if everything is set up correctly. If you still need to make adjustments or if you notice that something is not set correctly in terms of dimensions, this is the time to adjust the settings of your shipping label printer.

Photo

Step 5:

We're almost there! The last step remaining is to make sure you set up your printer properly on your PC. You can do this by going to "Settings" via Windows, then select "Devices" and click on "Printers and Scanners."

Photo

Step 6:

Select your Zebra label printer from the list and click on manage. Once you have done this, you can choose "Printer Properties."

Photo

Step 7:

You will then come to the screen below: Here, you will go to "General"and set the format in "Preferences".

Photo

Step 8:

Make sure you select millimeters and choose the correct format for your shipping labels again. In the case of a Zebra shipping label, this is 102mm x 150mm.

Photo

Step 9:

At advanced settings, click on "Calibrate." And close with "Apply."

Photo

Congratulations! You have completed the installation and are now ready to print your labels. Do you have enough Zebra labels in stock? If not, take a look at our zebra labels page.

Calibrating your Zebra label printer for Mac

Step 1:

To calibrate your Zebra labelprinter, you first need to open your browser and got to "localhost:631"

Photo

Step 2:

You are now in the “CUPS” menu. Here, select the “Printers” option from the menu.

Photo

Step 3:

Once you have selected the printers option, you will see a notification indicating that the web interface is disabled. Don't worry, this is easy to fix and is part of correctly setting up your Zebra printer.

Photo

Step 4:

To fix this, you need to copy the text “cupsctl Webinterface=yes” and open your terminal. You can open your terminal by pressing “cmd + space” and then search for "terminal".

open terminal

Step 5:

Paste the copied piece of text in the terminal en press enter.

Photo

Step 6:

Refresh your page with the refresh symbol in your browser, now you will see all printers that are connected to your Mac.


Photo

Step 7:

Select the Zebra printer from the list and select "Set Default Options" from the list where "Administration" is currently displayed.

Photo

Step 8:

The final step to complete your installation is to enter your Mac login credentials. Log in and your installation is complete.

Photo

Step 9:

At advanced settings, click on "Calibrate." And close with "Apply."

Photo

Congratulations! You can now get started with your Zebra printer, provided you have enough Zebra labels at home. You can also quickly and easily order them from Zolemba, take a look at our Zebra shipping labels, for example. If you still have any questions about installing your Zebra printer, feel free to contact us. The Zolemba team is ready to assist you so that you can quickly get started with your Zebra printer!

chevron-leftAlertBrowse fileDownload fileFileImagePdfWordTextExcelPowerpointArchiveCsvAudioVideoSpinnerCalendarSort NoneSort ASCSort DESCReturn arrowMinusThree DotsVisibleVisible